



Look at a character in any modern game – the first thing you read on their face is emotion. The squint of the eyes, the tension of the cheekbones, the subtle movement of the lips. Behind all this lies not only the animator’s talent but also the quality of the mesh beneath the model’s surface.
Poor face topology, and the character will smile like a mannequin: the shape is there, but there is no life. A good face topology, and even with a minimum number of polygons, the face will move truthfully.
This topic might seem technical, almost mechanical. But in reality, high-quality facial topology is about understanding anatomy, anticipating animation, and having a wealth of practical experience. In this article, we will break down what a correct grid consists of, where the most common mistakes occur, and how to structure your face modeling so that the rigger will thank you during the skinning process.

What Is Face Topology and Why It Matters
Topology is the method of organizing vertices, edges, and polygons on the surface of a 3D object. When applied to the face, it means exactly how the grid is structured, where the edge loops flow, and where the polygon density is concentrated.
The 3D character topology of a face differs from, say, the topology of armor or a prop. The face deforms. Constantly. Every line of dialogue, every glance, every moment of pain or joy is the work of a facial rig pulling vertices in different directions. If the loops are laid incorrectly, the mesh will start to fold, twist, and produce shading artifacts.
The difference in good topology vs bad topology is clearly visible in motion. A static render might hide problems. Animation never does. This is why a comprehensive face topology guide is essential for any character artist.
The Principle of Muscle Loops
The foundation of face topology for animation is the circular edge loops around key muscle structures. These are not arbitrary; they follow the anatomy precisely. The orbicularis oculi (the circular muscle of the eye) and the orbicularis oris (the circular muscle of the mouth) are the two main landmarks around which all face modeling is built.
The loops must encircle these areas in concentric rings. Why? Because when a muscle contracts, it pulls the skin precisely along its path. Loops that are parallel to the movement deform predictably. Loops that run across the movement create folds that shouldn’t exist or prevent natural stretching.
This is the basic principle. Everything else is just the details of its application.

Fun Fact
The human face is controlled by 43 muscles – and each of them affects skin deformation. It’s no wonder that face topology is considered one of the most difficult tasks in 3D modeling: essentially, you are building a technical system on top of an anatomical mechanism that evolution has been perfecting for millions of years.
Advanced Topology Poles & Flow Redirection
| Pole Type (Valency) | Strategic Placement | Technical Function | Animation Impact |
|---|---|---|---|
| 5-Valent Pole (N-Pole) | Zygomatic arch, nasolabial fold junction, chin-to-jaw transition. | Acts as a "diverter" to redirect circular mouth loops toward the ears and neck. | Prevents "stretching" artifacts when the jaw opens wide or during a broad smile. |
| 3-Valent Pole (E-Pole) | Inner corner of the nostril, tragus of the ear, philtrum base. | Used for "termination" or merging loops to reduce polygon density in static areas. | Minimizes unnecessary geometry in low-deformation zones while maintaining sharp forms. |
| 6-Valent Pole (Star-Pole) | Strictly Avoid in deformation zones; move to the scalp or behind the ear. | A convergence point of 6 edges that creates a "pinching" effect on the surface. | Causes catastrophic shading breaks and "black holes" during smooth shading (SubD). |
| Diamond Loop Flow | Malar (cheek) region, forehead center. | Interlocking loop patterns that allow the mesh to compress and expand like a bellows. | Essential for realistic "wrinkling" and micro-expressions (FACS-based animation). |
Eye Area and Eyelid Topology
“The eyes are the soul of the character,” artists say. From the perspective of the mesh, this is literally true: this is where the maximum complexity is concentrated.
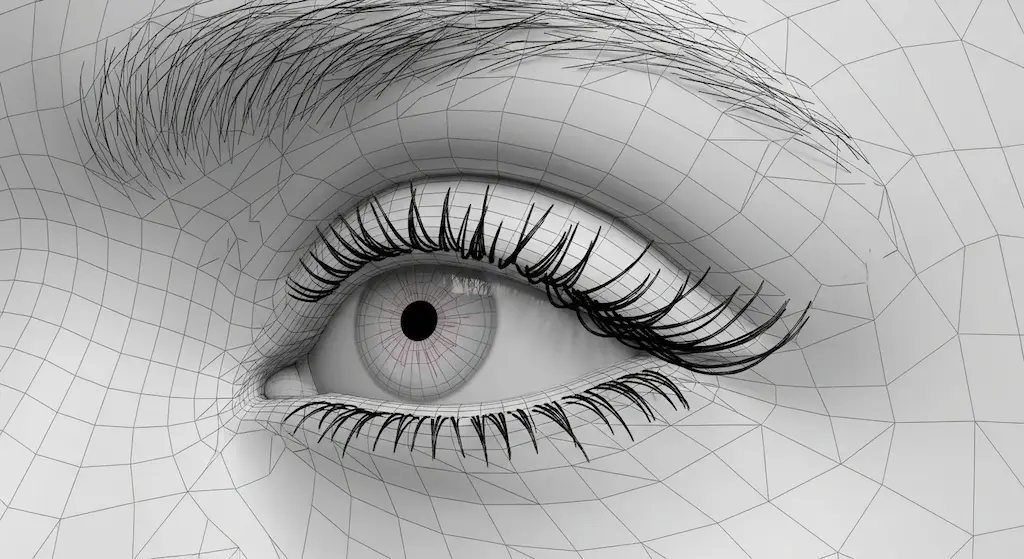
Correct eyelid topology is built from the outer edge of the eye inward, in rings. You need at least two loops around the eye opening – one along the edge of the eyelid and one slightly further back, providing volume and a smooth closure.
When blinking, the upper eyelid moves down: if the loops are not dense enough or do not follow the shape of the eyeball, the eyelid will begin to “cut through” it or, conversely, will not fit tightly.
Another frequent mistake is failing to account for the upper eyelid crease. This is a separate deformation zone and needs its own loop. Without it, expressions like “squinting” or “raised eyebrows” will look flat. For animation, it is recommended to have 3–4 circular loops around the eye orbit. For low poly face topology in mobile projects, this can be reduced to 2, but the range of expressions will be limited.
Mouth Topology: The Area of Maximum Load
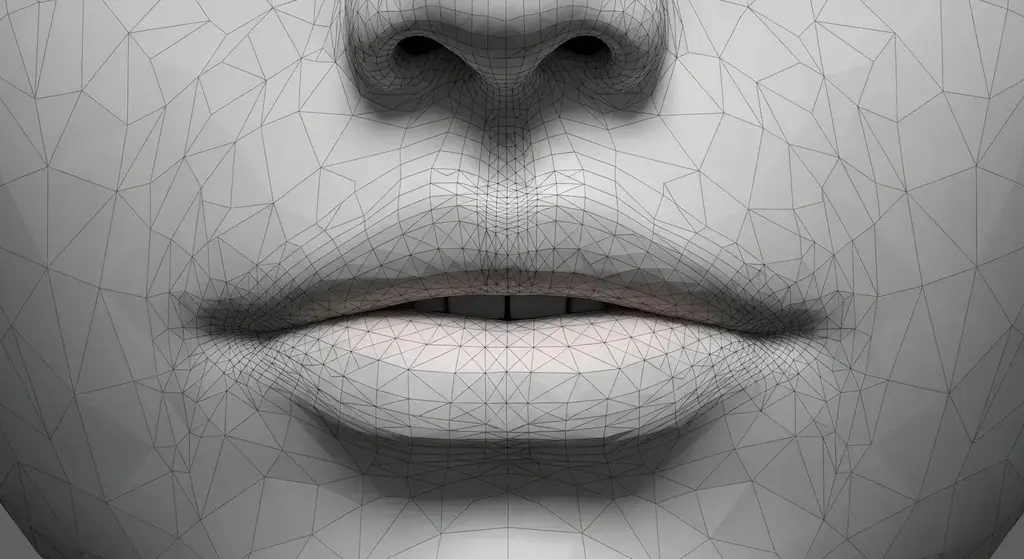
The mouth moves more than any other part of the face. Speech, emotions, kissing, screaming – all of these represent a huge range of deformations. That’s why mouth topology requires special attention.
The basic structure involves 2–3 concentric loops around the lips, plus separate loops along the very edge. The corner points of the mouth are poles where the flows converge. These are critical zones: this is where triangles or n-gons most often appear, causing artifacts during animation.
Practical advice: do not try to make the corner of the mouth into a perfect quad pattern. A pole with 5 edges is inevitable there – and that is fine. It is important that it is located not in the active deformation zone, but slightly to the side. Then it will be practically invisible during movement.
The depth of the lips is also important. If the mesh only follows the surface without inner loops, when the mouth opens, you will see the geometry “collapse.” Add at least one loop inside along the edge of the lips.
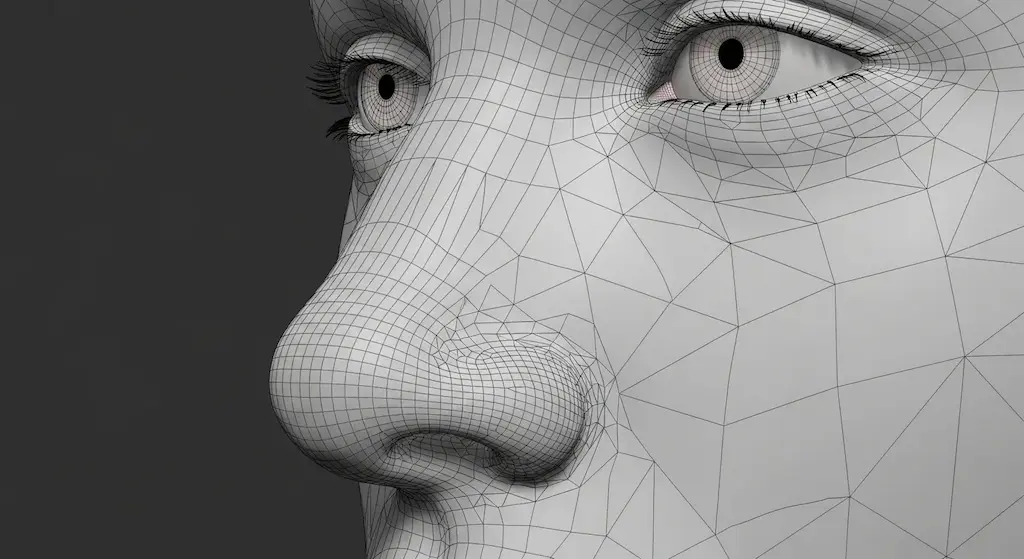
Nose Topology: A Balance Between Form and Economy
The nose is an area where beginners often accumulate unnecessary geometry. There is a desire to convey every nuance of the shape, and as a result, loops appear that lead nowhere and only increase polygon count without benefit.
Effective nose topology must solve two tasks: preserve the shape of the nostrils and support the nasolabial fold. The wings of the nostrils are a separate zone with a characteristic shape that needs to be defined by a pair of loops. The nasolabial fold connects the nose to the corners of the mouth and works actively when smiling.
An important point: the loops from the nose should not flow directly into the cheek. This breaks the edge flow of the cheek and creates problems during deformation. It is better to direct them downward toward the mouth – where they will organically merge with the mouth loops.
Head Topology: The General Framework
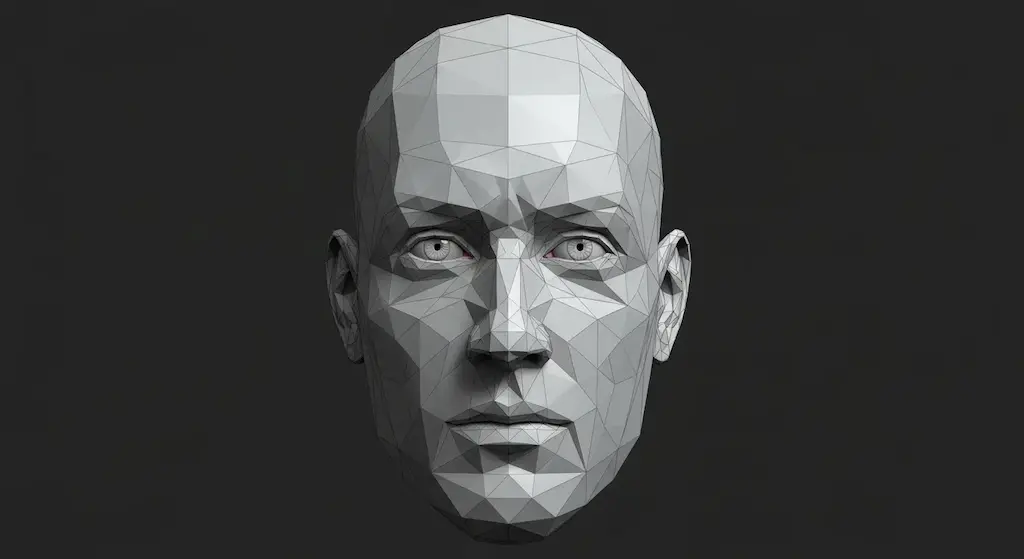
Now let’s talk about the broader picture. The topology of a human head is not just the face, but also the skull, ears, and neck. Each of these zones has its own requirements.
The back of the head and the crown are relatively calm zones; a uniform grid of medium density is sufficient there. However, the transition from the face to the skull requires careful redistribution of loops: the density decreases, but the edge flow must be maintained without sharp breaks. This overall head topology ensures the model is stable.
The ear is a separate story. It has a complex spiral shape, and trying to integrate it directly into the main head mesh almost always ends with triangles in awkward places. It is better to model the ear separately and then stitch it along the edge – triangles in the seam area are acceptable because the ear hardly participates in animation.
As for the chin and jawline: at least one loop is needed here, running from the chin to the ear. It forms the jawline and allows the animator to work correctly with the movements of the lower jaw.
Good Topology vs Bad Topology: How to Tell the Difference
Here are several signs by which you can immediately judge the quality of the work:
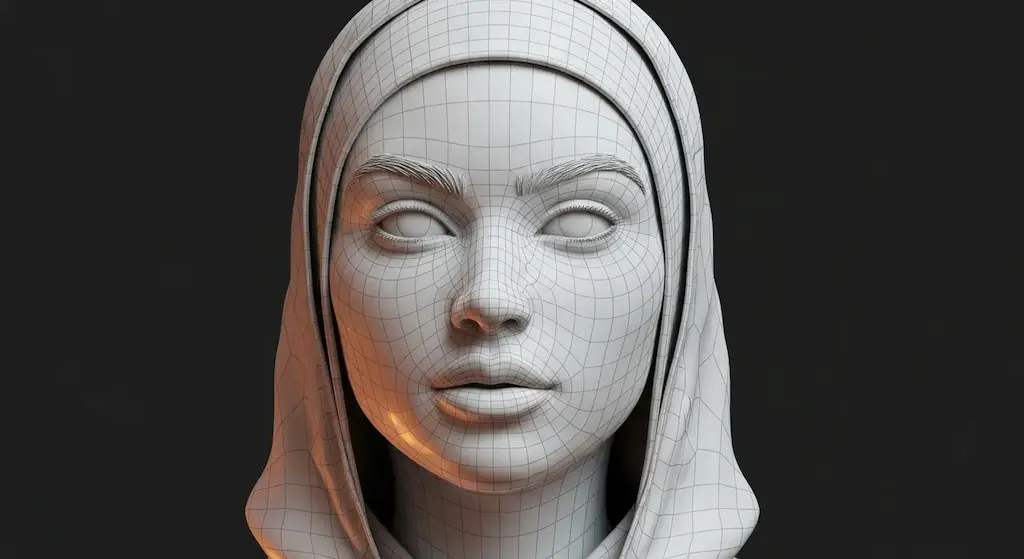
Good Topology:
– Predominantly quads, without n-gons.
– Loops follow muscle structures.
– Density increases where deformation is needed.
– Poles (vertices with 3 or 5 edges) are moved to static zones.
– No artifacts during test deformation.
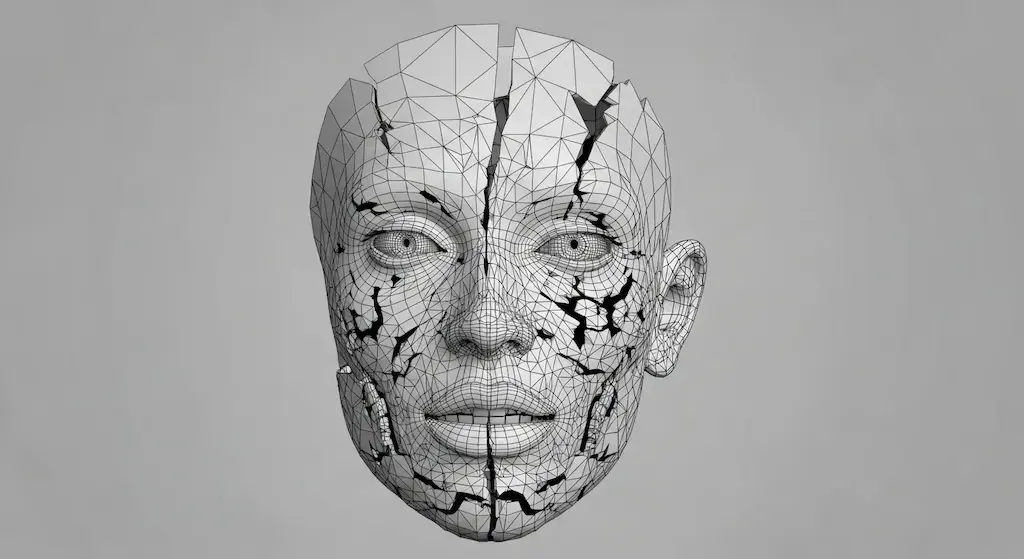
Bad Topology:
– Triangles in the eye and mouth areas.
– Loops that break off in the middle of an active zone.
– Uniform density across the entire face – too much where it’s not needed, and too little where it is.
– N-gons in an organic model.
The gap between these two approaches is most visible during animation. Statistically, both grids may look fine. However, a proper topology face structure is built for movement, not just for a screenshot.
Bad topology
Good topology
Anime Face Topology: Simplification Without Loss of Function
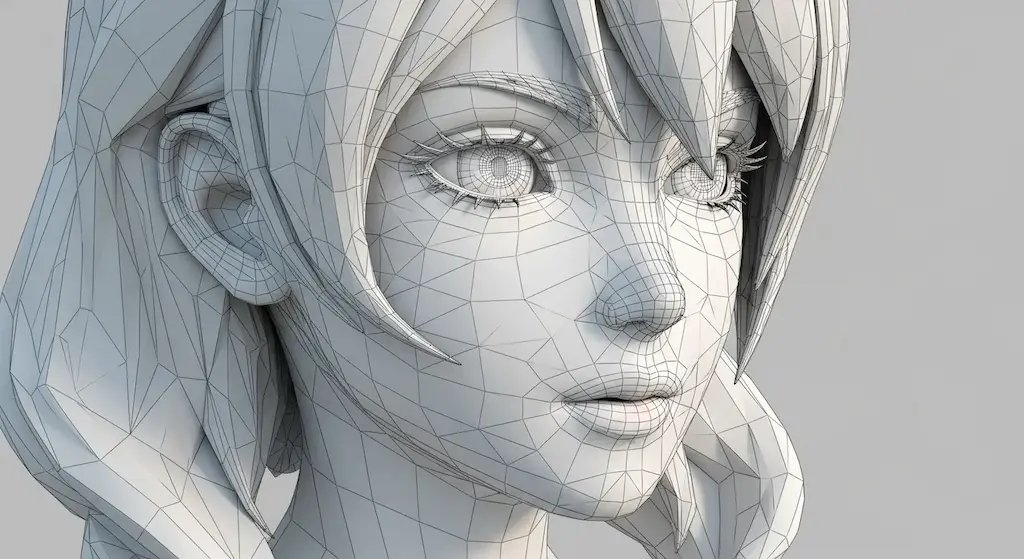
A separate discipline in character art is working with stylized characters. Anime face topology solves the same problem as realistic topology but with different structural constraints.
Enlarged eyes require denser loops around the orbits. A minimalistic nose requires a simplified structure but still takes the nasolabial fold into account. A stylized mouth may have fewer loops, but the basic principle of concentric rings remains.
It’s a common misconception that that stylization removes the requirements for topology. Animation requirements do not go away. The shape is just different, but the laws of deformation are the same.
Low Poly Face Topology and Face Retopology
In game development, not only the rules are important, but also the polygon budget. Low poly face topology is the art of compromise: keeping the necessary loops while removing everything unnecessary.
For mobile games, the face budget might be 200–500 polygons. For a AAA PC title, it could be 5,000–15,000. The difference is huge, but the principles of loop placement are the same – only their number and density change.
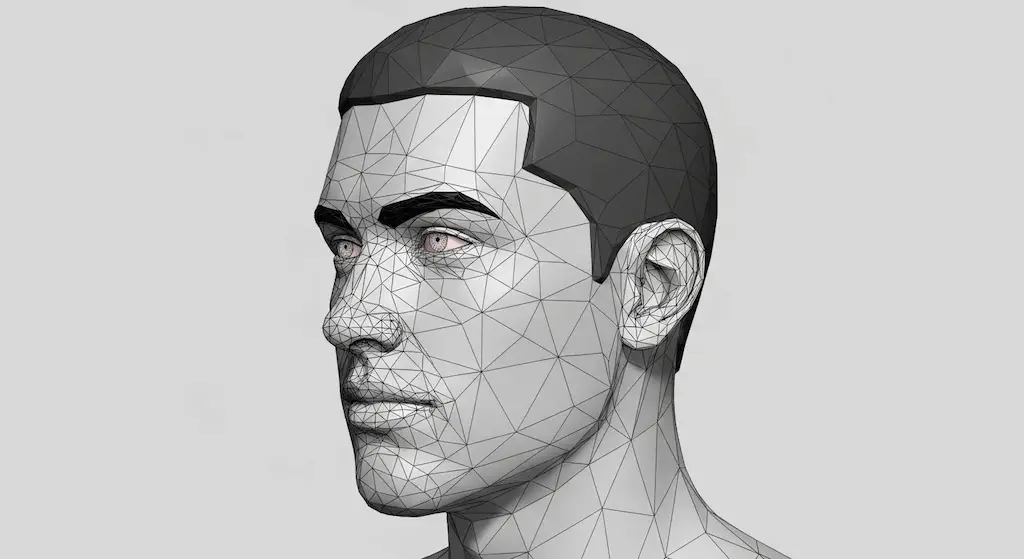
Face retopology is a separate stage of the pipeline where a finished sculpt from ZBrush or another package is “redrawn” with a clean grid. A retopology guide for the face always starts the same way: first, we lay the orbital loop around the eyes, then the oral loop around the mouth, then connect them with the nasolabial structure and build everything else. This is not a random sequence – these zones define the entire edge flow of the face.
Blender Face Topology: Tools and Approach
Blender face topology is a popular topic because the software is free and accessible. For working with the face, the following are used: Loop Cut (Ctrl+R) to add loops, Knife (K) for arbitrary cuts, and Inset Faces (I) to create nested loops around the eyes and mouth. These are the core tools for 3D modeling topology.
An important point: test the deformation at every stage. Don’t wait until the model is “finished” – add a simple armature and check how the mesh behaves during basic movements. This will save you hours of subsequent edits and teach you how to model face features correctly from the start.
Excellent external resources for practicing modeling for animation include Topology Guides, which breaks down the principles of building loops for deforming surfaces. An academic foundation in anatomy, useful for understanding facial muscle structures, is provided by Visible Body Human Anatomy.
When You Need an Experienced Partner
If your project requires animation-ready characters – not only beautiful but also technically well-constructed – the VSQUAD Studio team works specifically on this.
Since 2015, we have specialized in outsourcing for the gaming industry: 3D character art, face retopology, and the full cycle from concept to production-ready asset. Our portfolio includes work for Wayfinder, Darksiders Genesis, SMITE, Ruined King, and other major titles.
We can integrate into an existing pipeline within 48 hours and scale the team to the project’s needs – from indie to AAA. Our models meet the requirements of both mobile platforms and PC/Console with high poly budgets.
FAQ
At least 2–3 concentric loops. For an extended range of expressions, 4–5. Fewer than two, and when the mouth opens or there is a wide smile, the grid will start to produce deformation artifacts.
In static zones, it is acceptable. In areas of active deformation (mouth, eyes, nasolabial fold), it is undesirable. A triangle breaks the edge flow and often creates unwanted folds or pinching during animation.
Face modeling is the construction of a grid directly during the process of creating a character. Face retopology is the reconstruction of a mesh over an already finished sculpt to obtain a clean, optimized grid with correct edge flow. Retopology always gives a neater result but requires extra time in the pipeline.
The principles are the same – muscle loops, rings around the eyes and mouth. The difference is in the proportions: enlarged eyes require a denser orbital zone, and the nose is simplified but without losing functional loops. Stylization affects the shape, not the structure.
It is an approach with a minimum number of polygons while maintaining basic animation loops. It is used in mobile games, browser projects, and VR/AR – anywhere performance is critical. Key loops (around the eyes and mouth) are preserved even with a tight poly budget.
The best way is a test animation. Add a basic rig and check 5–6 key expressions (smile, frown, open mouth, squint, surprise). If the mesh doesn’t produce pinching, unwanted folds, or shading artifacts in any of them, the topology works.
Mastering Face Topology for Animation
Face topology isn’t about the beauty of a wireframe in a screenshot. It’s about how the model will behave in motion. Corrected loops around the eyes, mouth, and nose are an investment that pays off in every frame of animation. The difference between good face topology and “just a closed mesh” becomes obvious the moment the character needs to come to life.
If you want your characters to move as well as they look, contact us → 📩 head@vsquad.art or schedule a call. We will handle the topology, retopology, and everything else.
Get in touch
Got a project in mind? We usually reply within a day.